Manufacturing Example
Manufacture of the instruments is intended to be undertaken on a small distributed scale. It is intended that a network of musician/artisans will produce instruments from locally sourced materials from patterns produced by CyberFeral and that the instruments will partly be sold directly to relatively wealthy musicians through the project web site. The efficient flow of funds from wealthy musicians to poorer artisans will aid in the international effort to Make Poverty History.
The design demonstrated here is suitable for urban fringe artisans where the identified materials are available. The design can be adapted to suit the materials available in other areas.
The Body
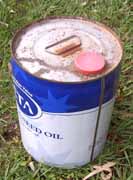
This is made of the bottoms of two 20 litre vegetable oil cans. I get mine from several local fish and chip shops who are happy to give them away.
The cans are cut using a combination of blades and shears to their required heights. The can which will be the "belly" of the guitar is cut to about 120mm; the other, to about 30mm.
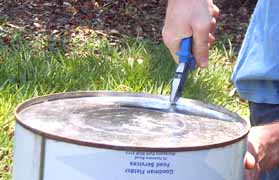
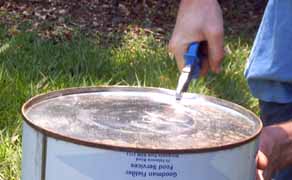
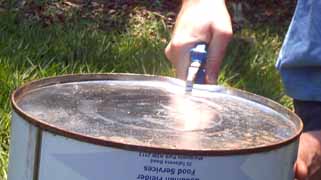
Next, the rim of the "belly" is bent out and flat using a pair of pliers specially modified for the job. You can see that one of the jaws of the pliers is notched which allows you to consistently grip the folded-over edge of the bottom of the can. I use very cheap pliers (about $5) which are made of softer steel and allow the modification to be done with a hacksaw, file and sandpaper. The edges of the jaws are also rounded and smoothed to minimize sharp dents in the rim.

The folding is begun by bending one part of the rim about a third of the way down, then moving along the rim about the width of the pliers, bending a little further, then by the third bend, the rim can be bent flat. We then continue all the way round the rim until the rim is flat and smooth.
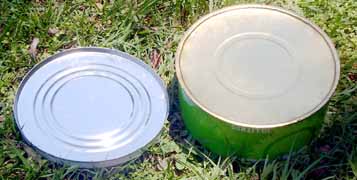
The centre of each piece is then "domed" using a softwood stick. The body piece is supported on a donut shaped piece of wood (craftwood in this case).
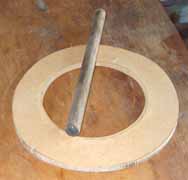
The stick is simply rubbed accross the centre of the body piece while pressing firmly. This deforms the steel into the shape of the dome. The process is improved by having another person slowly turn the piece while you rub; producing a"daisy" pattern. The stick should be lubricated for this process. I find the oil left in the can ideal for this.
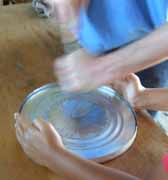
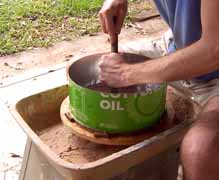
The doming process can be further improved by the use of a wheel similar to a potters wheel. The wheel can be a manually operated "kick wheel" but here I'm using a modified electric wheel.
When the rim turning and doming is complete, the Belly piece has a cross section similar to this...
When the guitar is assembled the back piece will be fitted into the belly piece to form a closed space. If the back is too tight, it needs to be crimped to fit. If it's too loose, it can be secured with screws. The holes for the screws are made with a punch.
The hole on each side of the body which allows the spine to go through is cut with a small chisel, the pieces are then folded in and may be adjusted to give a tight fit.
Back to Top ---o--- Back to project home
The Neck
The shape and length of the neck will depend on the desired string configuration (steel, nylon, guitar, banjo, mandolin, etc) and on the materials available. In this case I'll explain the use of reclaimed 2x3 hardwood to produce a steel string guitar...
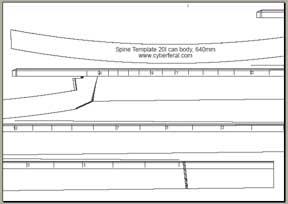
We use the template to mark and cut out the spine and fret board as seperate pieces. If the wood available is large enough we can also cut them out as one piece. A two piece construction makes forming the neck-body join easier but requires extra time and care in marrying the two pieces together.
The thickness of the spine piece will depend on the strength of the material being used. The template assumes well seasoned hardwood. For weaker materials such as pine, the piece is cut thicker.
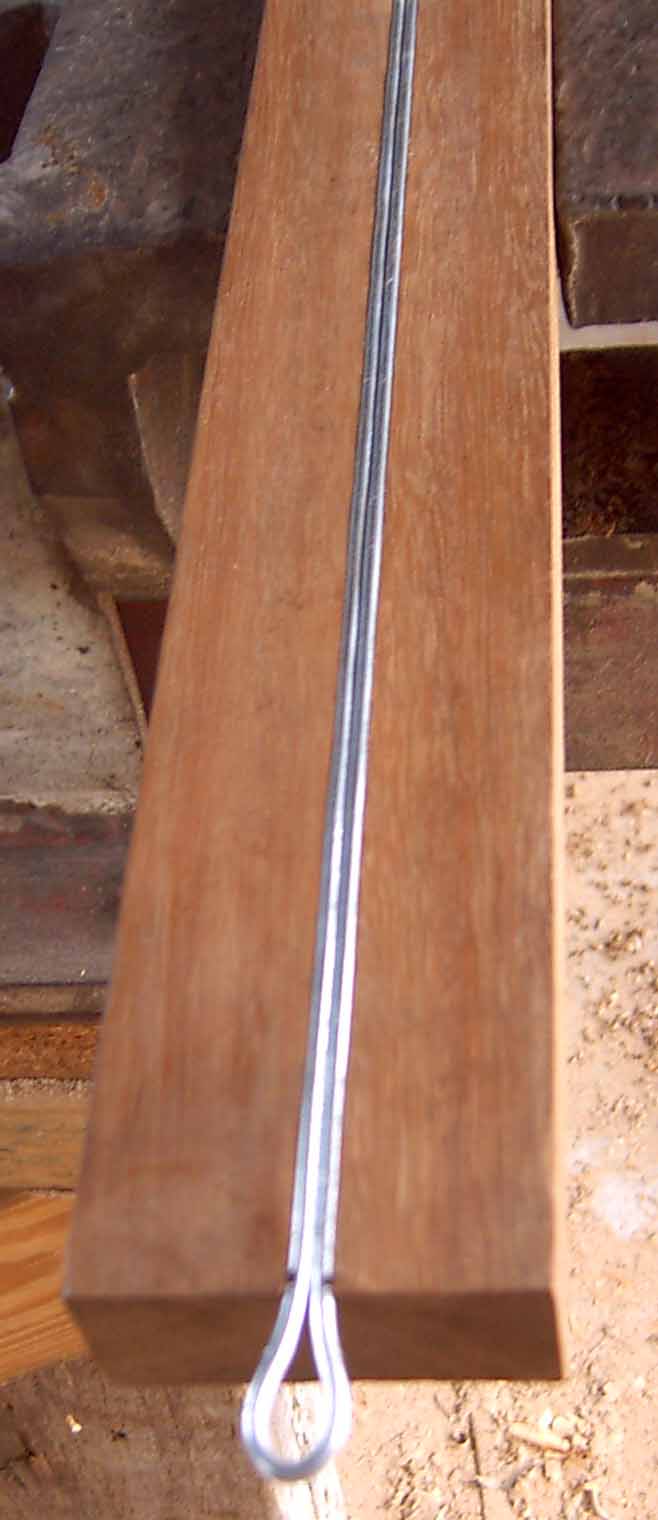
The two pieces are then dressed as flat as possible on the surfaces where they meet and screws are fitted at the appropriate places to keep them together during the shaping process.
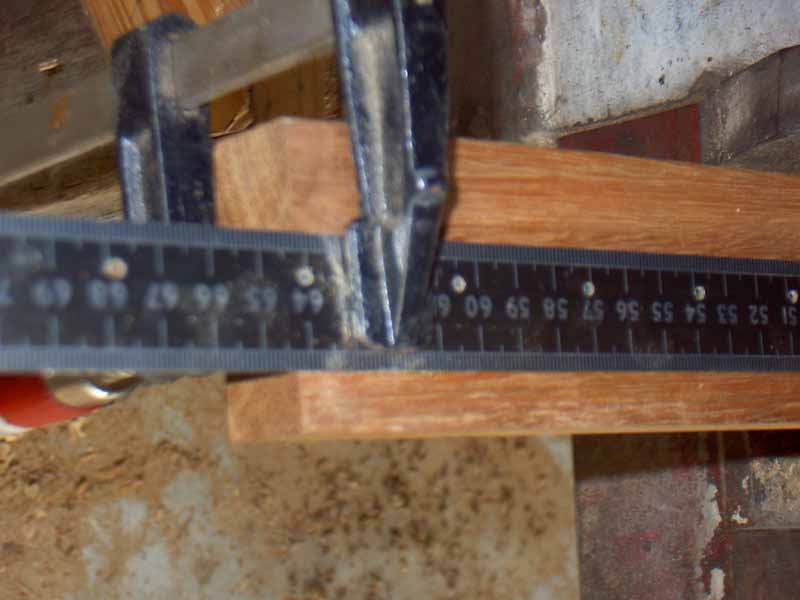
Holes for the strings should be drilled at this point. Several sets of holes can be drilled to allow for the use of recycled strings; which are shorter than new strings. When shorter strings are used, the "zero fret plate" is moved to just below the string holes in use and now adjustment to the bridge is necessary.
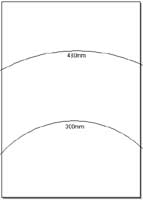
The profile of the fret board is shaped with the aid of a 300mm curve template and the back of the neck is shaped according to feel and preference. The cutout at the neck body join is shaped using the same 300mm template and care must be taken to ensure that the join is not-too-tight-not-too-loose.
Here are the templates...
Back to Top ---o--- Back to project home
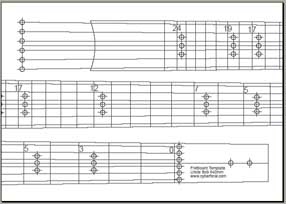
The Frets
The positioning of the frets is transfered to the material of the edge of the neck by one of a number of techniques.

The frets themselves may be nylon monofiliment, tie wire or other suitable material. 1mm diameter is an appropriate size. Nylon monofiliment (fishing line) is easier to apply and harder wearing; wire has a louder, brighter tone and can be finely adjusted to compensate for unevenness in the surface of the finger board.
The frets can be wound "clock wise" or "anti clock wise", I recommend winding so that the thumb of the fretting hand is more-or-less parallel with the windings on the back of the neck.
As the frets are wound on, tension is applied; the more tension the better so long as the breaking strength of the fret material is taken into account.
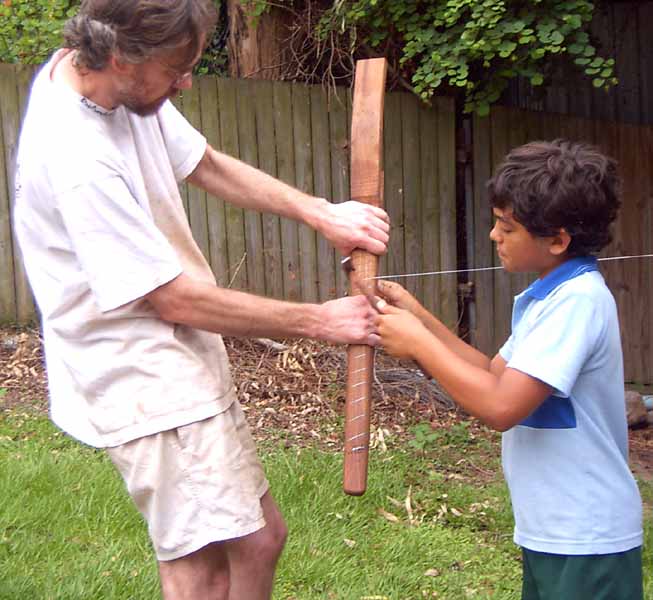

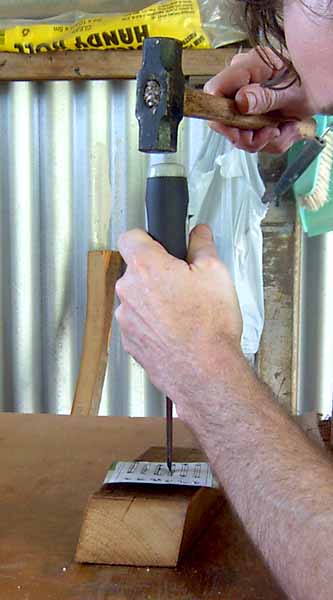
Here the winding process is shown. In this case the frets are wire and they are hammered into place by another person to ensure a tight fit. This hammering is not done on nylon frets as they are more elastic and can be damaged by the hammer.
Back to Top ---o--- Back to project home
The Tuner
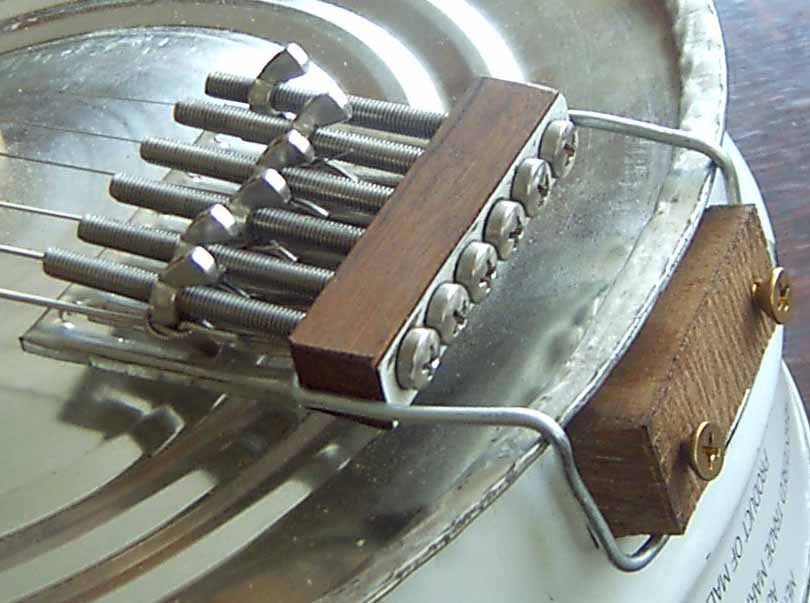
The tuner is probably the most critical part of the build, as far as accuracy in construction goes. On this model I am using M5 x 65mm phillips head bolts and standard wing-nuts. Other options include cup head bolts and drum lugs.
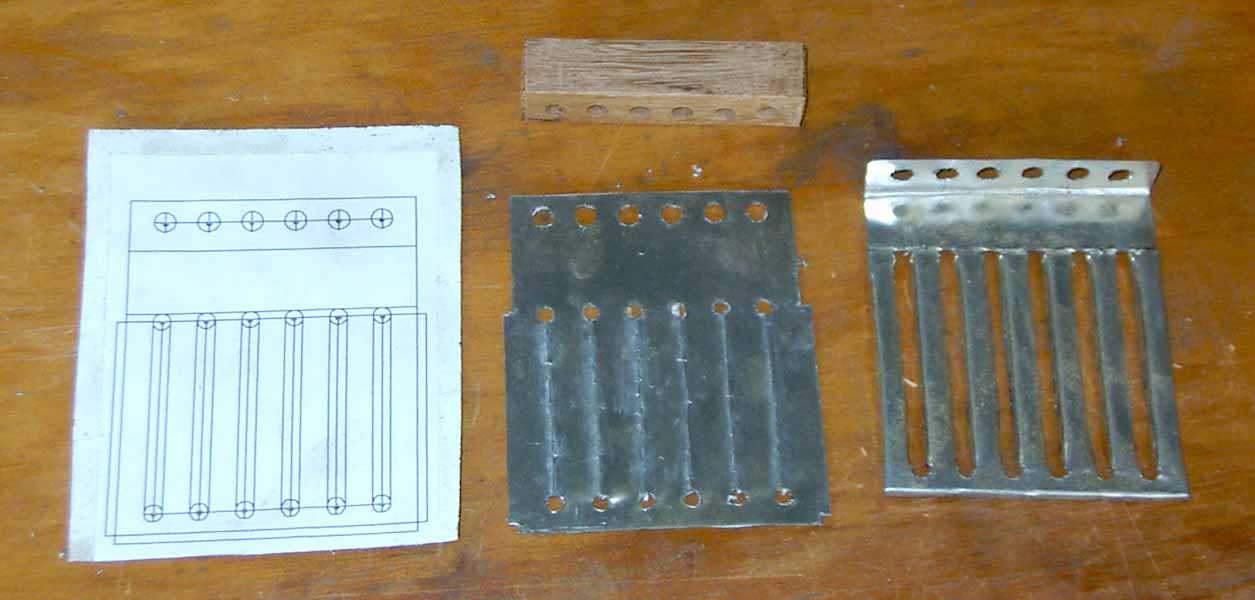
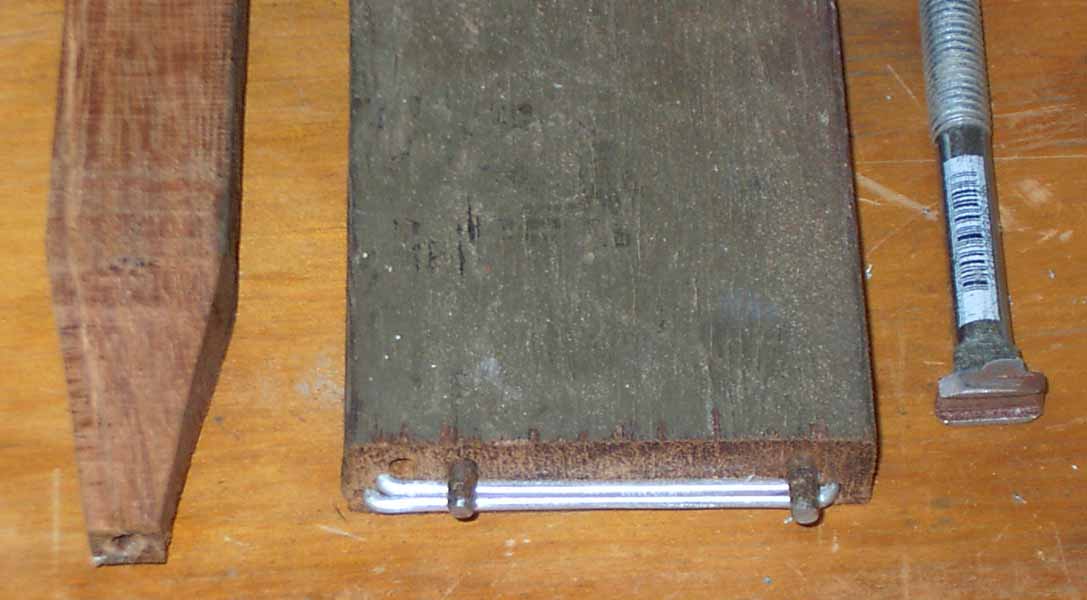
The Tuner is made up of a block of wood with 5mm holes spaced at 10mm; a steel plate, made from off cuts of the original can and cut and formed according to the template; and a length of wire to hold it in place. The plate can also be made of wood. The wire can be replaced with a suitably strong cord, or the tuner can be built into a block to screw onto the tail of the instrument.
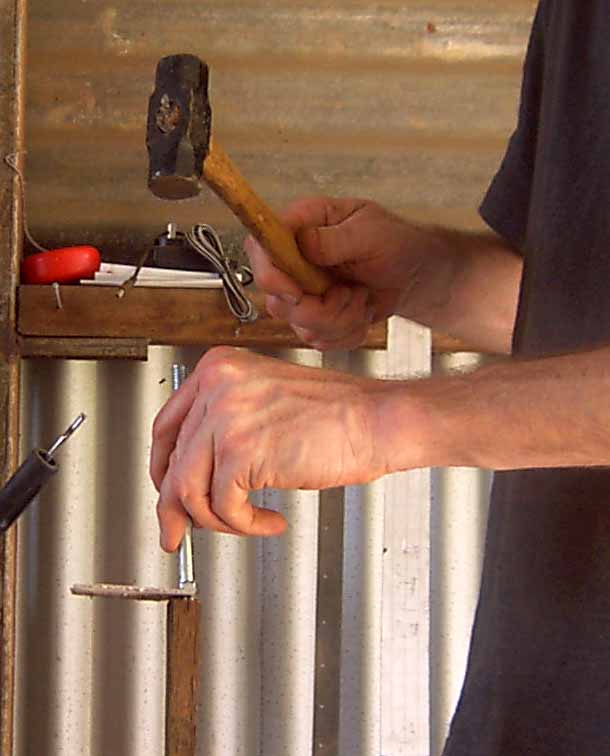
This shows the tuner plate in three stages of completion; the paper template glued to a piece of steel, left over from the oil can; the plate drilled and cut, with the wood block above; and the plate fully formed. The next picture is the cutting process, using a hammer and chisel.
These are the tools used for forming the plate, a picture of the process and another of the plate partly finished..

First Assembly
When the three main pieces are complete to this point, they are then assembled.
The body must be cut to allow the neck to pass through. The position of the holes is important as they set the angle between the fret board and the belly and ultimately the "break" angle of the strings across the bridge.
It may be convenient to cut the sound hole or holes at this point. The positioning and number of holes is up to the maker as the impact they have on the final sound of the instrument is quite complex and subtle.
Back to Top ---o--- Back to project home
Electronics
Electronics are optional and they add considerably to the materials cost of the instrument. That aside, they do add considerably to the functionality too. Acoustically, the design here is not terribly loud; quieter than a standard wooden body acoustic guitar. With built in pickups though, it works very well in a normal rock band context. The electronics I've designed don't require a preamp or batteries and can be plugged straight into a normal guitar amp.
The pickups used are piezo electric disks. You can get them from electronics shops where they're often used in buzzer kits. You can also find them in musical greeting cards and as the system speaker in some computers. You should expect to pay about $3 for one. My circuit uses two. In use, they're simply glued to the underside of the belly of the instrument, I use 5 minute epoxy glue.
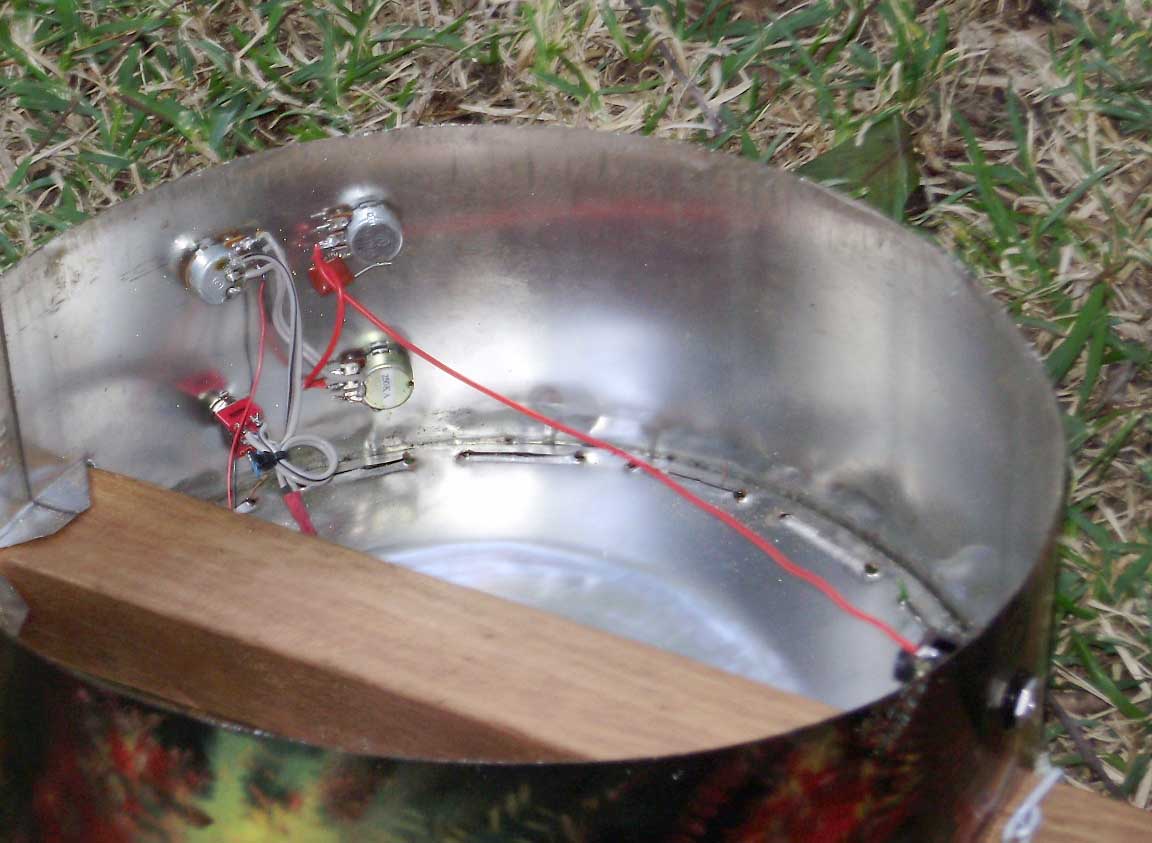
Here are the circuit diagram and a picture of the wiring. Don't forget you can click the image for a larger version.
Feel free to email me for more information on this.
Back to Top ---o--- Back to project home
The Bridge
Once the pieces are together, strings can be fitted and the first bridge can be cut to suit. The intonation of the instrument is controlled by the shape of the bridge and the tone is influenced by the materials and weight.
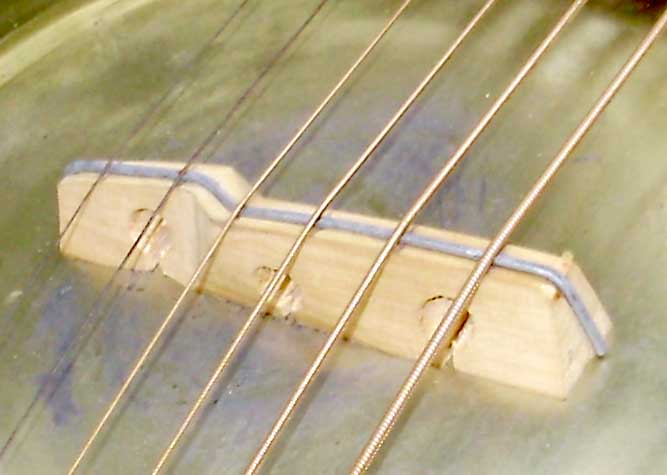
In this case I've made the bridge from a piece of 6mm compressed fibreboard (Masonite TM) with a piece of wire fitted to the top. The fibreboard can be easily cut and shaped with sandpaper and files. The wire is seated into the top in a shallow groove and the string spacing can be maintained with shallow grooves in the wire.
Care should be taken to ensure that the bottom of the bridge is a good fit to the belly so that the pressure of the strings is evenly transfered to the body. If the fit is bad, then it can cause small dents in the body which will probably cause weakness and failure in the belly dome.
Conclusion
It will be noted that the instructions given are, at best, somewhat cursory. We are keen to improve the instructions and to provide them in as many forms and languages as possible. Can you help?
We have makers available to demonstrate the construction and to assist in the setup of factories and as medium term residential teachers and are keen to hear from other makers willing to help in this manner.
When you have built your own, please get in touch with pictures, feed back, whatever. We want as many instruments made as possible and we want to celebrate every one.
Back to Top ---o--- Back to project home
The Uncle Bob is a CyberFeral Project